How to create 3D scene in the browser with ThreeJS.
Let's try 3D graphics in the browser. We will create a 3D scene with ThreeJS. It is going to be a Christmas tree. Before we start you can check the Demo
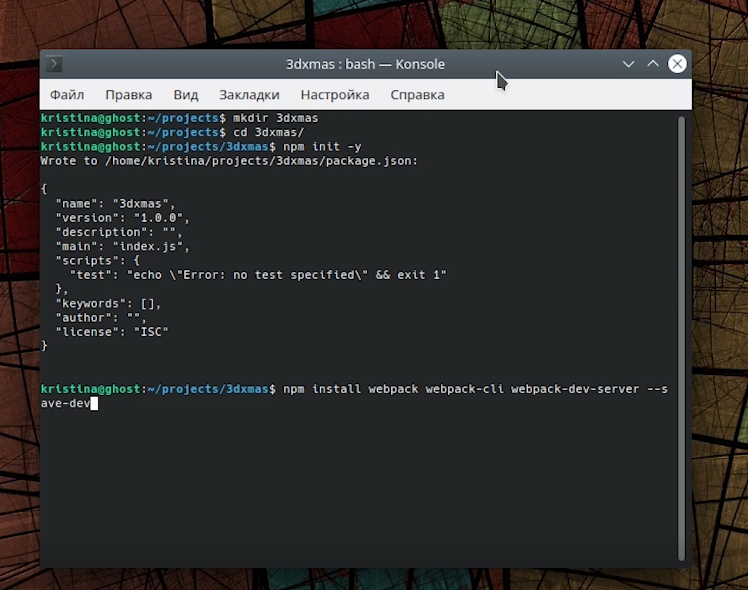
First, we need to create a project.
npm init -y
Then install Webpack
npm install webpack webpack-cli webpack-dec-server --save-devNow let's install ThreeJS.
npm install --save threeNow create folders src and dist
In the project folder, we need to create a webpack config file: webpack.config.js
const path = require('path');

module.exports = {
  entry: './src/app.js',
  output: {
    filename: 'app.js',
    path: path.resolve(__dirname, 'dist'),
  },
  devServer: {
    contentBase: './dist',
  },
};
Nothing special here. We take a source file here: ./src/app.js and put the compiled file here ./dist/app.js
Now we need to create index.html inside dist.
<!DOCTYPE html>
<html lang="en">
<head>
    <meta charset="UTF-8">
    <meta name="viewport" content="width=device-width, initial-scale=1.0">
    <title>Document</title>
</head>
<body>
    <script src="app.js"></script>
</body>
</html>
Open package.json and add commands to run webpack
"scripts": {
    "test": "echo \"Error: no test specified\" && exit 1",
    "watch": "webpack --watch",
    "build": "webpack",
    "start": "webpack serve"
  },
Everything is ready, open ./src/app.js in your favorite editor and let's get started.
First, we need to add ThreeJs.
import * as THREE from 'three';Now to create a canvas, we use a renderer.
const renderer = new THREE.WebGLRenderer();
renderer.setSize( window.innerWidth, window.innerHeight );
document.body.appendChild( renderer.domElement );
The basic element is a scene.
const scene = new THREE.Scene();Also, we need a camera. We've chosen the most popular - the perspective camera. This projection mode is designed to mimic the way the human eye sees.
const camera = new THREE.PerspectiveCamera(75, window.innerWidth / window.innerHeight, 0.1 , 1000);
camera.up.set(0, 0, 1);
camera.position.z = 5;
First, we set as 75 is frustum vertical field of view, from bottom to top in degrees. The second is the aspect ratio. Then the Camera frustum near the plane. The last Camera frustum far plane.
To make the coordinate z to be vertical, we set the vector up.
PerspectiveCamera( fov, aspect, near, far )
fov— Camera frustum vertical field of view.aspect— Camera frustum aspect ratio.near— Camera frustum near plane.far— Camera frustum far plane.
Now let's create the main loop.
function animate() {
    requestAnimationFrame(animate);
    renderer.render(scene, camera);
}
animate();
At this point, we can try to run the project.

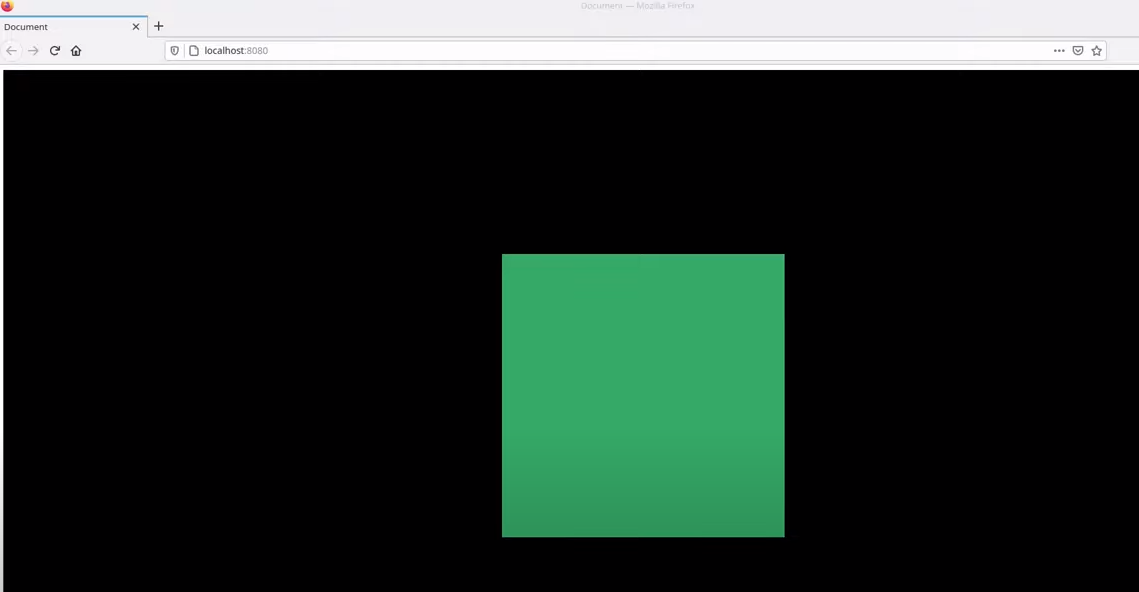
Open in the browser http://localhost:8080/ All we can see is darkness, which is expected since our scene is empty. Let's create something simple first, it will be a cube. First is geometry.
const geometry = new THREE.BoxGeometry(2, 2, 2);We created a cube with a size 2. Now we need material, it could be just a plain color.
const material = new THREE.MeshBasicMaterial({ color: 0x33aa66});Using geometry and material, we create a mesh and add it to our scene.
const cube = new THREE.Mesh(geometry, material);
cube.position.z = 1;
scene.add(cube);
Let's open http://localhost:8080/ again.

Now we can see the cube - top view. To test our scene, we need to be able to rotate the view by mouse. We add the built-in Orbital Control.
import { OrbitControls } from 'three/examples/jsm/controls/OrbitControls';

const controls = new OrbitControls(camera, renderer.domElement);
Now we add it into the loop and test.
function animate() {
    requestAnimationFrame(animate);
    controls.update();
    renderer.render(scene, camera);
}
animate();
Now we can rotate the scene. Let's create a floor.
We have this picture: carpet.jpg, we need to put it to the folder - dist.
We need to load the picture and create a texture. We use a loader for it.
const loader = new THREE.TextureLoader();
loader.load("carpet.jpg", texture => {
});
After the texture is loaded we can create a mesh. We used PlaneGeometry The floor position is z = 0
loader.load("carpet.jpg", texture => {
    const carpet = new THREE.Mesh(
        new THREE.PlaneGeometry(15, 15),
        new THREE.MeshLambertMaterial({map: texture})
    );
    carpet.position.z = 0;
    scene.add(carpet);
});
If we check the scene right now, we won't see any carpet. This is because we don't have any source of light. Let's add some.
const spotLight = new THREE.SpotLight(0xffffff);
spotLight.position.set(200, 400, 300);
scene.add(spotLight);
To add some Xmas mood we need the Christmas tree.
We can download a free model from the Internet in OBJ format.

In the archive, we can see: .obj is our tree, .mtl is materials.
We need to move the files to the project folder - dist
And for these files, we need special loaders.
import { MTLLoader } from 'three/examples/jsm/loaders/MTLLoader.js';
import { OBJLoader } from 'three/examples/jsm/loaders/OBJLoader.js';

const manager = new THREE.LoadingManager();
new MTLLoader(manager).load('12151_Christmas_Tree_l1.mtl', materials => {
    materials.preload();
    new OBJLoader(manager).setMaterials(materials).load("12151_Christmas_Tree_l1.obj", tree => {
        tree.scale.set(0.1, 0.1, 0.1);
        tree.position.y = 5;
        scene.add(tree);
    });
});
Here we go, our Christmas tree is ready. Now let's give our cube a texture so it would look like a gift.
loader.load("gift_wrap.jpg", texture => {
    const geometry = new THREE.BoxGeometry(2, 2, 2);
    const material = new THREE.MeshBasicMaterial({ color: 0xffffff, map: texture});
    const cube = new THREE.Mesh(geometry, material);
    cube.position.z = 1;
    scene.add(cube);
});
And now our Christmas scene is complete. Demo
You can download the project here: github.com/webgirlkristina/3dxmas